Nextcloud: Sync Calendar with MacOS
By Marc Miller
on Mon Jul 26 2021

The MacOS calendar sync documentation is either incorrect or out of date as of this writing. Here are the steps to get the calendar sync working properly with MacOS.
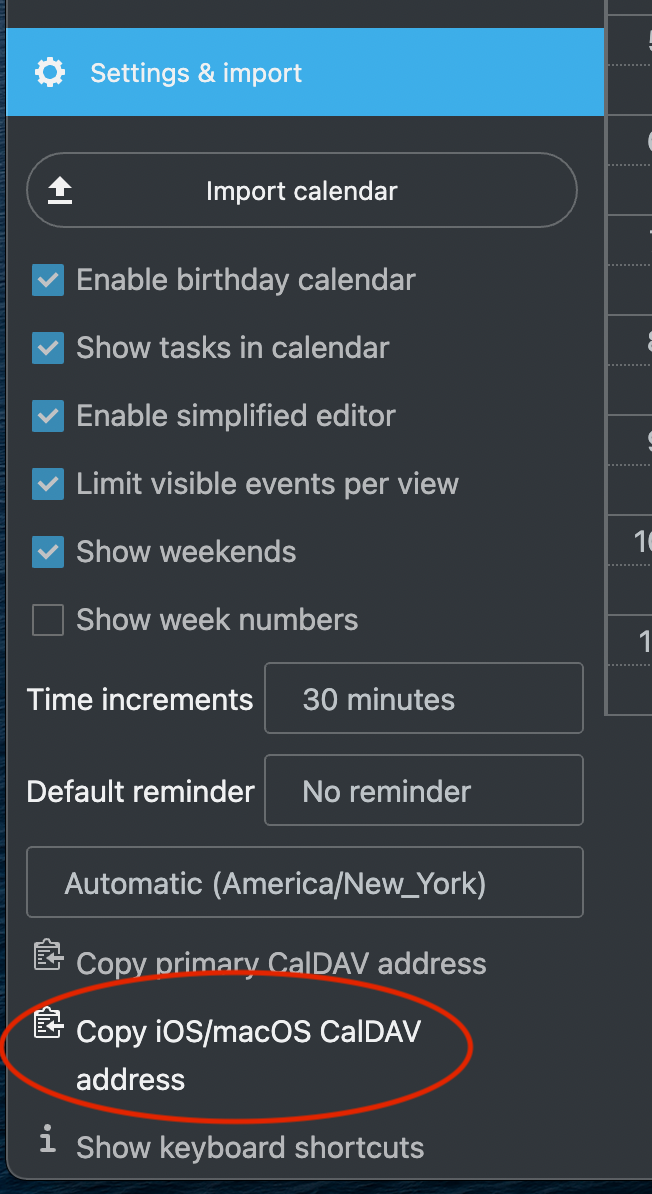
- First, what we want to do is go into your Nextcloud account and snag the CalDAV address. You can find this in Nextcloud Calendar > Settings & Import > Copy iOS/MacOS CalDAV address. Click and it will copy to your clipboard.

- In any text editor, or a notes app, you’ll want to paste the address you copied. It should look something like this:
https://cloud.mywebsite.com/remote.php/dav/prinvipals/users/marc/
What you’ll want to do is paste this address and split it into two parts that we’ll need:- Your Nextcloud server address: https://cloud.mywebsite.com
- And the calendar location: /remote.php/dav/principals/users/marc/
- Go to System Preferences > Internet Accounts
- Click the plus (+) sign at the bottom to add a new account and click add other account
- Click CalDAV account
- There should be a pop-up window with a dropdown. Here’s what to do:
- Account Type: Advanced
- Email Address: Enter your Nextcloud account email address
- Password: Enter your Nextcloud account password
- Server Address: Copy the first part from above, the Nextcloud server address
- Server Path: Copy the second part of the address from above.
- Port: 443
- Use SSL: Be sure this is checked!
- Click Sign In
I ultimately discovered the solution in this post within the Nextcloud community. This should prove to be successful in connecting your Nextcloud calendar to MacOS as it did for me!
